Showing posts with label Construction. Show all posts

Sunday, 14 April 2013

Construction - How JESSICA Made The Font


As mentioned in an earlier post wanted an ombre affect on our font. The two colours we picked for our font was pink and blackblack because it is a bold colour also the Apple Garamondfont in black makes the name Melanie Fiona stand out more and look like a statement. The colour pink was chosen because the image we are going to use for our album cover the lipgloss she used was pink (similar to the Keyshia Cole album who linked the background colour of the background with the ombre effect on the font) we are decided to link the colour of her lips with the ombre effect on the words.  

I created this font in Adobe Photoshop. Firstly I created typed Melanie Fiona in the AppleGaramond Font, making sure all letters are in capital letters. Once I had typed the letters up I then added a gradient overlay.


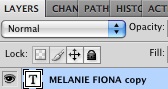
To add agradient overlay I first made sure that the layer containing the font was selected then clicked on the FX icon (at the bottom on the layer tab). After I had clicked on theFX icon a dialog box appeared. Next in the dialog box I clicked on the gradient overlay section. Once I have selected the gradient overlay the default gradient overlay ofblack and white appeared on my font. However I want the gradient overlay to flow from blackinto pink, therefore to make it easier for me to customize the gradient I first changed the degree of the  gradient from 90 to -90. Moreover all I would have to change is the white to pink.

To customize the gradient I double clicked on the gradient (which made another dialog box appear). The dialog box allowed me to alter the colour of the gradient changing it from white to pink. 

Update 
When putting the font on top of our image we noticed that it contrasted greatly with the image, making it uncomfortable to look at. Moreover we decided to change the colours we used for the gradient overlay from black-white-pink to white-pink.

Friday, 15 March 2013

Construction - Making the shots slip into the timeline and increasing or decreasing shot length. - Prince And I

During the construction and editing of our music video we decided to use final cut . Since no one in our group was a pro at using final cut it meant that some  of the effects that we wanted to use in our music video either limited or wasnt done at all. This for us as a group was destressful, knowing that this would hold us back in editing and then would bring down the overall quailty of our music video. Luckily we had final cut pros at our disposal via youtube on the internet. We found that most of the problems that occured, when searched on the internet or youtube could be easily overcome using the tutoriasl that were availible. this allows to learn tthe skills quick enough to apply them to our video without it looking shabby.

Here is one of the videos we used to help us with the editing:


From watching this short video you would probably have an idea of what type of problem we encountered during the editing. Well, on recording day where we went to shoot our videos we thought we had done a great job in terms of lighting, the song and...the lip syncing. But we were later proved wrong when we were exposed by final cut. We put in a clip into final cut and made sure it corresponded with the sound track and found that our artist had come out of lip sync or was too slow or too fast half way in a verse. This was a problem, a very big problem and with the deadline for our rough cut just days away and no time to record, we needed to find a way to overcome this problem. This is where the help of this video came in. We simply used one of the tools on final cut to speed up or slow down the video so that the lip syncing and the sound track went together!(Prince)

Here is how we did it: 
First i had to locate the problem or the part of the clip which i want to edit and either make slower or faster. When thius was done i highlighted/selected the part fo the clip. I then i went to "Modify - Speed"

This caption shows us moving the speed by increasing
the percentage.


In this shot we had to move the shot within the created
timeline we had and then slow it down using
properties then speed. Thus tehn decreased the shot making it slowed and the overall shot longer or we could do the reverse. 


In this shot it shows us moving the black bars that we have
 created into the newly cut and shortened scene.
This was gragged acrosss the timeline which allowed us to
use it across the video without replying it in every shot added.


Monday, 25 February 2013

Construction - How The Black Bars Were Made (Jessica)

Before we started to gather together our footage we had to start getting the basics down first. So when we started to construct our video we started with the black bars, our base for the entire video.
In order to make our music video look more professional, as well as give it a cinematic look; we decided to add black borders. The black borders we made simply in Adobe Photoshop. 
Firstly I opened up Adobe Photoshop and name our PSD file as Black Border (easy, simple name). I then set the width to 800 pixels and height 1200 pixels. Making my PSD this size means that rather than trying to find the exact measurements of the borders; it would be easily to use the crop tool and alter the size as much as I would want. 
Once I have set all the necessary details I clicked on the ok button and proceed onwards. As you can on the right all the preferences I set gave me a vertical rectangle white box. Next I needed to change the colour of the rectangle box to black before I can alter the size of the PSD. To do this I simply used the bucket tool selected the colour I wanted which was black then clicked on the rectangle box and it changed to black. 
Next (using the crop tool) alter the size of the PSD. Using the crop tool I change the vertical rectangle to a horizontal rectangle - by making the rectangle horizontal it would fit much easier into our music video. As you can see on the picture on the right I stretched the crop tool across the rectangle box until it touched both ends and then pressed the enter button; now it looks like this:
After I had made it the size I wanted it to be, I then used the select tool and made it wide enough to make sure that on either size there is an equal amount of black left out. I made sure the amount of black that I left out was too skinny, in order for me to be able to play around with the size in Final Cut. Next using the CMD + X ( command and X keys) I cut out the selected part of the rectangle which gave me a white background.
Finally I have made the black borders which will give our  music video the professional, cinematic group. When I was finally satisfied with the look of the black borders, I went to file - save as.
I made sure that I saved the black border in a easily place for me to locate later in Final Cut, I also saved the PSD file as a PNG; this ensure that the white part of the rectangle will not appear on the video,

Friday, 1 February 2013

Construction - How We Inserted The MTV Base Logo

In order to make our music video look as realistic as possible, we decided to add the MTV base logo. this insured that we included our target audience and the research that we had done with what our audience would look for. furthermore, it indicates that that would be publicly shown on a national channel.
 Step 1:
choosing the picture
Firstly we went onto the internet and searched for the logo best to suit our video as the channels have different versions of the same logo. We eventually found a logo that looked similar to the one as is seen under actual music video, viewed On TV. 
This was the original image that we chose to use for our music video we had decided to take this into photoshop and edit.

Step 2:
editing in Photoshop
Then it is dragged into photoshop for editing. We first took out all the black boarder around it so that it fits into the video more and then we put some brightness on it just for it to stand out.


Step 3:
Transferring it into Png
We saved it as a png so that we can out into final cut

Step 4:
Applying it to Final cut

Step 5:
Adjusting it to our video